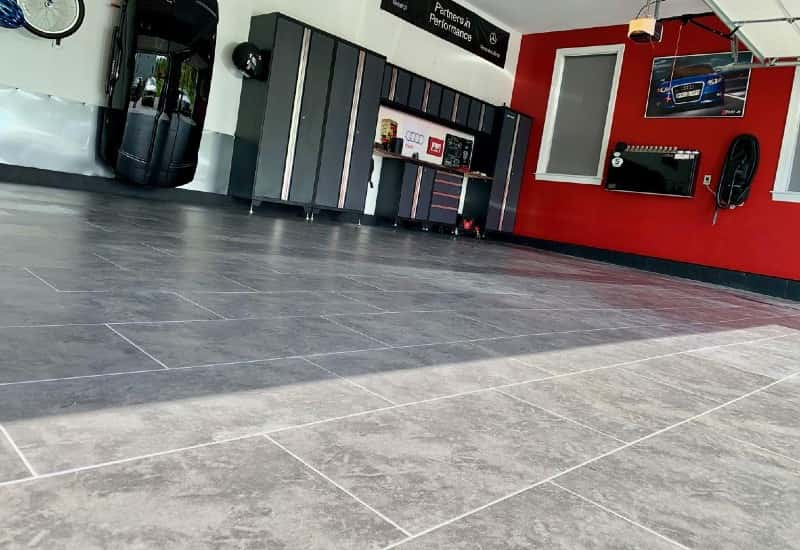
If you want to improve your garage with a new concrete floor, you might be wondering how to do it right. You don’t want to end up with a cracked, uneven, or ugly slab that will ruin your garage’s appearance and functionality. You also don’t want to waste money on hiring a contractor who might not do a good job or charge you too much.
The good news is that you can do it yourself with some planning, preparation, and patience. You can also save money by using a ready-mix concrete product that is easy to use and resistant to cracking. By following some simple tips, you can create a concrete garage floor that will last for decades and look great.
Contents
Choose a Level Slab
One of the first decisions you need to make is whether to have a level slab or a stepped slab for your garage floor. A level slab means that the entire floor, including the garage, is poured at the same height. A stepped slab means that the garage floor is four inches lower than the rest of the house.
Some contractors and building inspectors might tell you that you need a stepped slab to prevent gasoline spills, vapors, or carbon monoxide from entering the house. However, this is not required by most building codes anymore, as modern cars are less likely to leak or emit harmful substances. A level slab is cheaper, easier, and safer to install than a stepped slab. It also eliminates the risk of tripping over the step or damaging your car’s bumper.
Unless your local code requires otherwise, opt for a level slab for your garage floor.
Prepare the Ground
The most important factor for a strong and stable concrete slab is the ground underneath it. You need to make sure that the soil is compacted, leveled, and free of organic matter, such as roots, grass, or leaves. You also need to remove any rocks, gravel, or debris that might interfere with the concrete’s thickness or bonding.
To prepare the ground for your garage floor, you need to dig out about 12 inches of soil from the area where you want to pour the concrete. You also need to create a one-inch gap between the soil and the edge of the slab by digging inward from the perimeter. This will allow the concrete to expand and contract without cracking.
You can use a shovel and a pickax or mattock to dig out the soil and create the gap. A pickax or mattock is also useful for cutting through any roots or hard materials that you encounter. You can use a level and a long board to check that the ground is even and flat.
Build the Form
The form is the wooden frame that holds the concrete in place while it cures. It also defines the shape and size of your garage floor. You need to build a sturdy and straight form that matches your desired dimensions and design.
To build the form for your garage floor, you need some 2×12 boards, some stakes, some nails, and some string. Cut the boards to fit your measurements or join them with cleats if they are too short. Nail them to corner stakes that are driven into the ground at least 12 inches deep. Use a level to make sure that the boards are horizontal and aligned with each other.
You can also use string lines to mark the edges of your slab and check that they are square and parallel. You can adjust the stakes or boards as needed until you have a perfect form.
Mix and Pour the Concrete
The concrete is the material that forms your garage floor. It is made of gravel, sand, cement, and other additives that make it strong and crack-resistant. You can buy ready-mix concrete products at most home centers that contain all these ingredients except water. You just need to add water according to the instructions on the bag and mix it well.
To mix and pour the concrete for your garage floor, you need a wheelbarrow, a hoe, a shovel, a trowel, some water, and some helpers. You also need to work fast before the concrete starts to harden.
Start by mixing one bag of concrete at a time in your wheelbarrow with water until you have a thick but workable consistency. You can use a hoe to stir it well and break up any lumps. Then shovel it into your form and spread it evenly with your trowel. Repeat this process until you have filled up your form with concrete.
You can use two helpers to speed up this process: one person can mix more concrete in another wheelbarrow while another person can help you shovel it into the form.
Level and Smooth the Concrete
Once you have poured all the concrete into your form, you need to level and smooth it so that it has an even surface and thickness. You also need to cut some expansion grooves into it so that it can accommodate temperature changes without cracking.
To level and smooth the concrete for your garage floor, you need a screed board, an edger tool, a groover tool, and a float tool. A screed board is a long straight board that you drag across the top of the wet concrete to remove any excess material and fill any low spots. An edger tool is a metal tool with a curved edge that you run along the perimeter of the slab to create a smooth edge. A groover tool is a metal tool with a blade that you use to cut grooves into the slab every few feet in both directions. A float tool is a wooden or metal tool with a flat surface that you use to smooth out any bumps or marks on the slab.
Start by using your screed board to level the concrete across the form. Work from one end to the other in a sawing motion, lifting the board slightly at the end of each stroke. Then use your edger tool to smooth the edges of the slab, pressing down firmly and moving along the form. Next, use your groover tool to cut grooves into the slab, following the string lines as guides. Make sure the grooves are about 1/4 inch deep and spaced about 10 feet apart. Finally, use your float tool to smooth out any imperfections on the surface of the slab, moving in circular motions and applying light pressure.
Cure and Protect
The last step for making your garage floor is curing and protecting it so that it becomes hard, dry, and durable. Curing means keeping the concrete moist and warm for several days while it undergoes a chemical reaction that makes it solid. Protecting means covering the concrete with plastic sheeting or blankets to prevent it from drying out too fast or cracking due to weather conditions.
To cure and protect your garage floor, you need some water, a hose, a spray nozzle, some plastic sheeting or blankets, and some bricks or weights. You also need some patience, as this process can take up to a week or more depending on the temperature.
Start by spraying water on top of the concrete every few hours for the first day after pouring it. This will keep it moist and prevent shrinkage cracks from forming. Then cover the concrete with plastic sheeting or blankets and secure them with bricks or weights around the edges. This will create a barrier against evaporation and temperature fluctuations. Keep the cover on for at least five days if the weather is warm (above 70 F) or seven days if the weather is cold (below 50 F). You can lift the cover briefly every day to spray more water on the concrete if needed. After the curing period is over, you can remove the cover and enjoy your new garage floor.
Add Some Finishing Touches
If you want to make your garage floor more attractive and functional, you can add some finishing touches to it after it has cured. You can paint it, stain it, seal it, or coat it with epoxy or polyurethane. These options can enhance the color, texture, and durability of your concrete floor. They can also protect it from stains, spills, abrasion, and moisture.
To add some finishing touches to your garage floor, you need to choose the right product for your needs and preferences. You also need to follow the manufacturer’s instructions carefully and prepare the surface properly before applying it. Here are some tips for each option:
- Painting: Painting your garage floor can give it a fresh and clean look. You can choose from different colors and patterns to suit your style. You need to use a concrete paint that is specially formulated for floors and resistant to oil and grease. You also need to clean and etch the concrete before painting it to ensure good adhesion. Apply at least two coats of paint with a roller or a sprayer and let it dry completely between coats.
- Staining: Staining your garage floor can give it a rich and natural look. You can choose from different shades and effects to create a unique design. You need to use a concrete stain that is acid-based or water-based and compatible with your concrete type. You also need to clean and degrease the concrete before staining it to ensure even penetration. Apply the stain with a sprayer or a sponge and let it react with the concrete for the desired time. Then neutralize and rinse the stain with water and let it dry completely.
- Sealing: Sealing your garage floor can give it a glossy and smooth look. It can also protect it from dust, dirt, water, and stains. You need to use a concrete sealer that is acrylic-based or solvent-based and suitable for your climate and traffic conditions. You also need to clean and dry the concrete before sealing it to ensure proper bonding. Apply one or two coats of sealer with a roller or a sprayer and let it cure for the recommended time.
- Coating: Coating your garage floor can give it a durable and professional look. It can also protect it from chemicals, abrasion, impact, and UV rays. You need to use a concrete coating that is epoxy-based or polyurethane-based and designed for garage floors. You also need to clean, etch, and prime the concrete before coating it to ensure strong adhesion. Apply one or two coats of coating with a roller or a squeegee and let it harden for the required time.
By adding some finishing touches to your garage floor, you can make it more appealing and functional for years to come.


